|
BIG
BLOCK FLARE
Installing a Vintage Air Front Runner system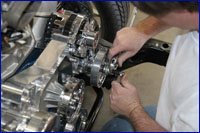
Story and Photos Courtesy of Fesler Built
Every custom classic ride needs the basic
elements to be classified custom. There is
the paint - a definite must - you won�t find
too many run down rides on the pages of this
site. Stance is another big factor- the way
a car rides and sits has a huge impact on
the overall theme and look of the vehicle.
And then there is the engine.
There are some instances; I do mean some
that a builder can get away with an original
factory power plant still stuffed under the
hood. But we are talking all original,
matching number scenarios. It just doesn�t
say much to see a decked out ride, that
tapped it�s owner out when the time came to
install an upgraded engine. Most custom
muscle cars today include an upgraded
engine. Whether the classic 350 or the
sought after 572, the bigger the better when
it comes to horsepower.
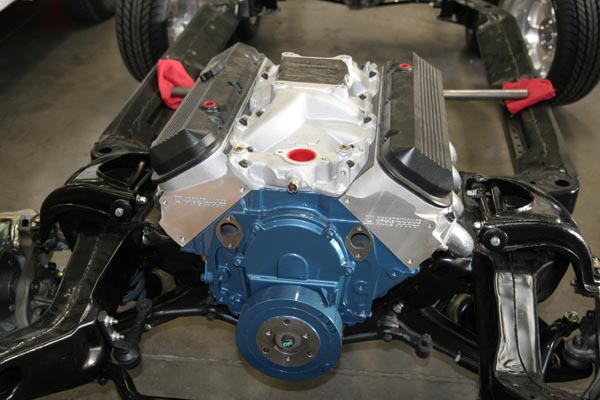
One such project under way was a 1970
Chevelle SS convertible being built by
Fesler Built in Phoenix, AZ. Already in the
midst of a new paint scheme, lowered
suspension and powder coated frame, this
classic ride was due for a heart transplant.
The planned equipment - a GM, fuel injected
ZZ 454 crate engine.
Known for being one of the kings of big
block crate engines, the GM ZZ 454 packs a
whopping 440 horsepower and 500 ft. lbs of
torque. The ZZ 454 unit makes exclusive use
of aluminum, specifically to keep the weight
down, making the aluminum heads, intake,
water pump and valve covers part of a total
package that is known for making awesome
horsepower.
As great as any 454 crate engine is, it
still lacked the serpentine drive system
necessary to connect the power steering,
engine, water pump, air conditioner and
alternator to one another, thus allowing the
engine to run. Most options included
purchasing an aftermarket system to bolt up
to our new engine. Wanting to incorporate
some �bling� into our new project, we turned
to Vintage Air and their new Front Runner
Serpentine Drive System to take care of our
needs.
For those of you behind in the times, a
serpentine drive system is just what the
name implies. It is a continuous belt loop
that winds its way through and around your
engine to drive various engine parts. The
serpentine system is more efficient than
older systems because it utilizes one wide
belt instead of several thinner belts,
allowing the one belt to be put under
increased tension without stretching. The
best known plus to the serpentine belt
system is that if the belt does break, the
driver immediately knows there is a problem
unlike the old belt systems where if one
belt broke, the driver may not become aware
that there is a problem until the engine
stops running.
So because Fesler wanted the best of both
worlds - bling and superior performance -
they elected to chose the Vintage Air system
because it is known for its reliability and
quality craftsmanship. It just goes to show
you that for every upgrade - suspension,
paint or stereo - there is one more thing
that can be done to make it that much
better.


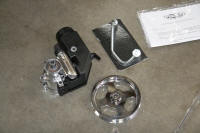
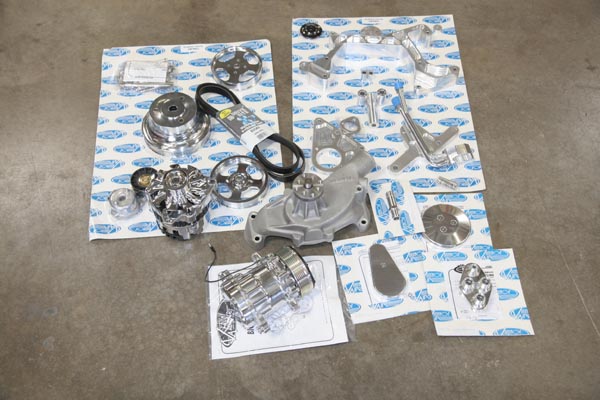
The Vintage Air Big Block Front Runner System comes complete with all 18
necessary parts to complete the installation.

Basically what we started with was a simple as it sounds. . .a big block. This
Vintage Air Front Runner system is compatible with either a Chevy 454 or 502.
For this installation we used a fuel injected ZZ 454.
The beginning of this installation is all about bolts, or studs for the water
pump. Silicone plays a big role in an installation such as this one because it
prevents leaking. Just a dab is all we needed on all four of the water pump
studs before threading them into the block.
Next, silicone was again used to secure the water pump gaskets to the block.

With the water pump gaskets in place we used a liberal amount of silicone on the
pump where it would meet up with our newly placed gaskets before installing the
water pump on the mounting studs.


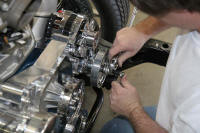
The power steering bracket was next to be installed. We first installed the
supplied spacers to the mounting studs then installed the steering bracket on
the lower driver side mounting stud making sure we placed the (2) stand offs
between the engine block and power steering bracket. We secured the new bracket
using the supplied bolts and washers.


The water pump pulley can be installed one of two ways. Vintage Air�s
instructions suggest you install this piece before installing the water pump. We
found it easier to install the pulley after we had already secured the water
pump. Because the pulley is asymmetrical, we made sure to install it with the
stamped side towards the water pump.

The Vintage Air system now comes with the necessary straight heater hose fitting
for the water pump so we did not need to worry about salvaging our original one
or hunting down a new one from a local parts store. This new addition from
Vintage Air is a timesaver for sure.

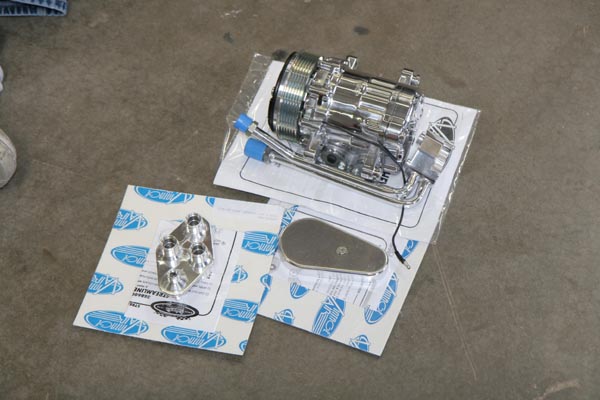
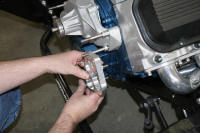
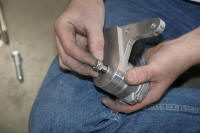
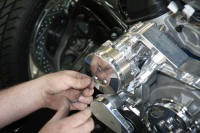
Next, on its own, we installed the compressor block fitting to the supplied
Sanden SD-7 compressor utilizing the supplied cap screws and washers.


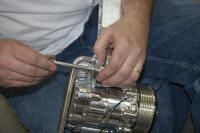
Next, we installed compressor on the front runner main bracket using two
spacers, one between the main bracket and the compressor�s upper rear mounting
tab and one between the main bracket and the compressor�s lower rear mounting
tab. The compressor and bracket were secured using the supplied hardware making
sure we threaded the bolts from the back side of the compressor through the main
bracket.
Installing the alternator was as simple as lining up the holes to the main
bracket and securing with the bolts and washers.
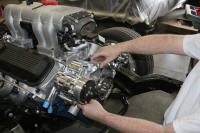
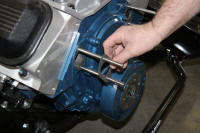
With the main front runner bracket assembled, we installed it to the block by
sliding it over the water pump mounting studs. We used the supplied washers and
nuts to secure the driver side of the assembly while using a separate set of
bolts, washers and nuts to secure the alternator to the power steering bracket.


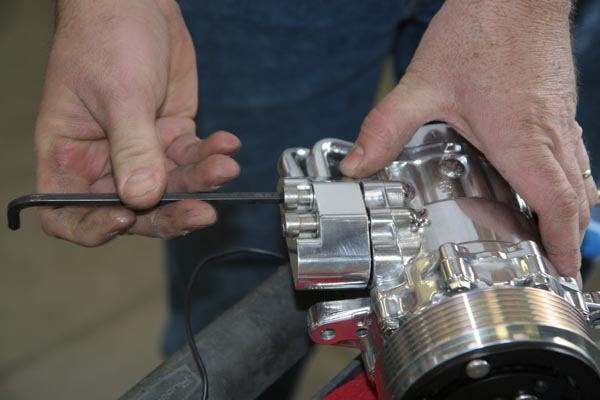
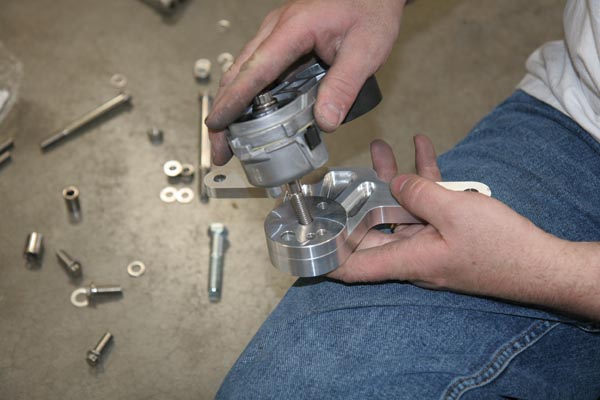
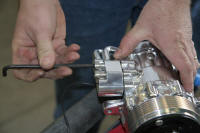
Next on the list was the belt tensioner and bracket. We carefully installed the
dowel pin in the locating hole of the tensioner bracket. This dowel pin is a
press fit so we used a hammer to lightly tap the dowel pin into the locating
holes. Next, we installed the tensioner spacer on the backside of the belt
tensioner.

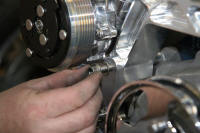
Finally we installed the belt tensioner with spacer and tensioner bracket to the
passenger side mounting studs. We used the tensioner stand off between the block
and bracket and then secured the top of the bracket to the water pump mounting
studs.

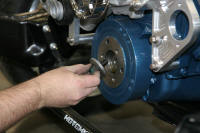
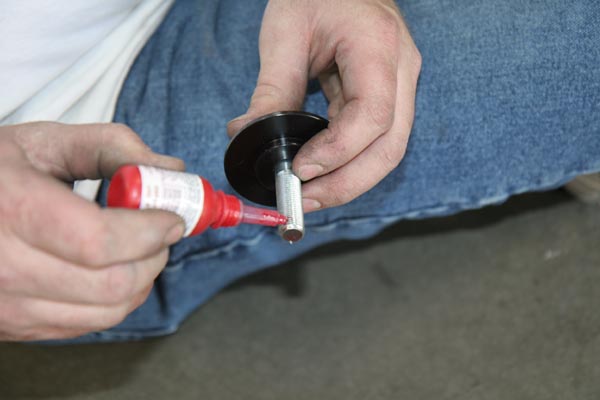
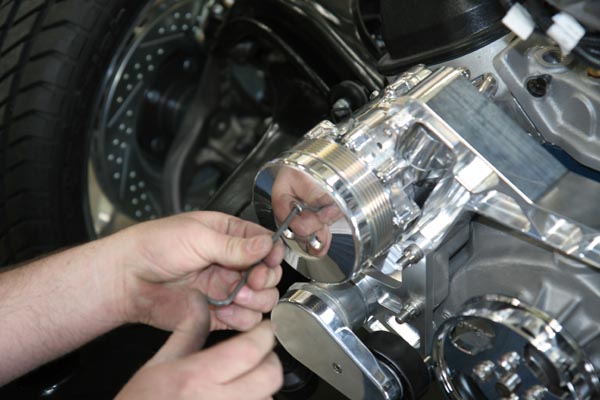
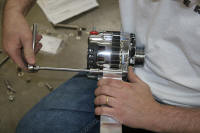
Before installing the crankshaft pulley on the harmonic balancer, we had to
remove the stock bolt/washer combo that came with the engine from the factory.


With the stock bolt/washer combo removed we installed the crankshaft pulley on
the harmonic balancer using the new SS bolts and washers. We then secured the
crankshaft pulley to the crankshaft snout with the supplied hat washer and hex
bolt using lock tight to ensure a tight fit.
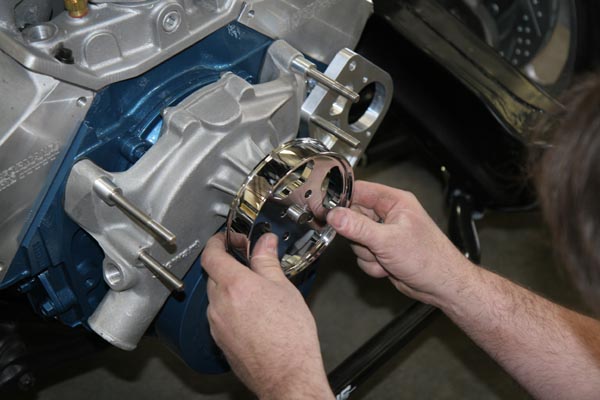
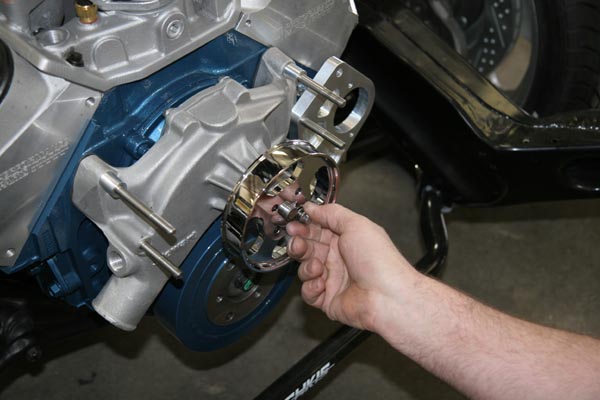
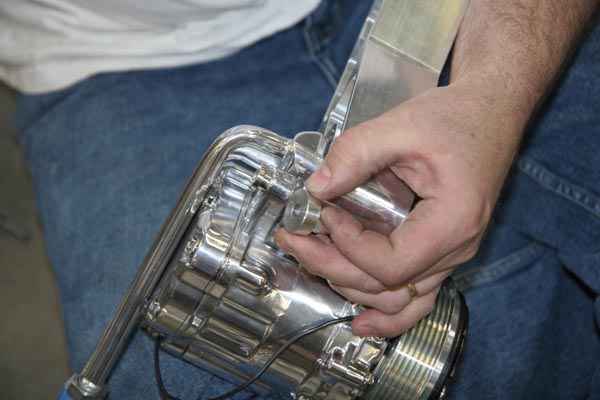
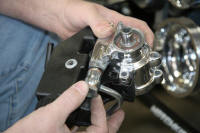
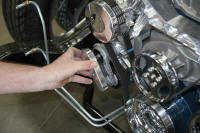
To finish off the look of our compressor we installed the polished end cover.

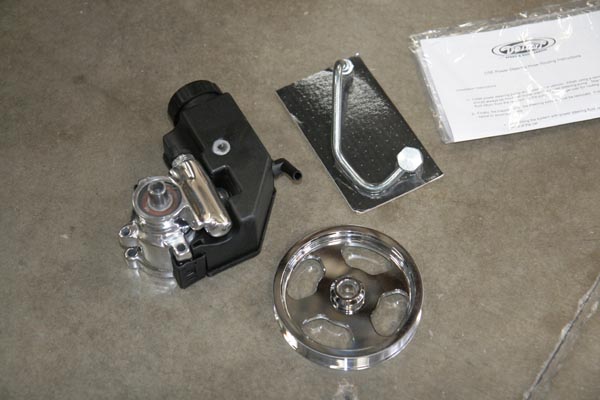
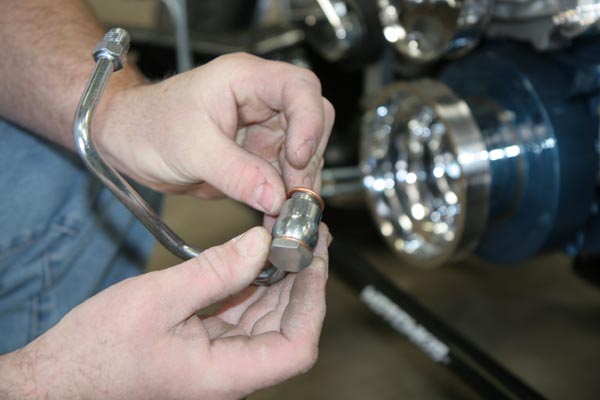
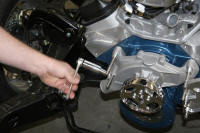
The line for the steering pump will not be accessible after we install the pump
so it was necessary to connect the line before installing the pump. To do so, we
first installed a set of copper crush washers on a piece of polished line before
attaching it to the steering pump.


Using anti-seize (a substance that permits the bolt from seizing inside its
metal destination) on all bolts, we installed the power steering pump to the
ready and waiting bracket and tightened into place.
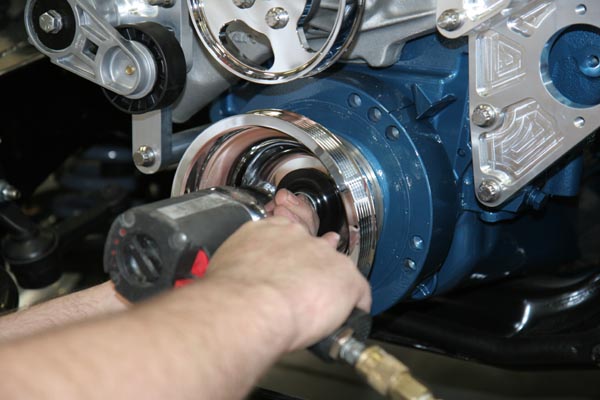
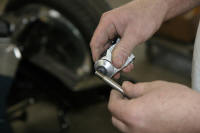
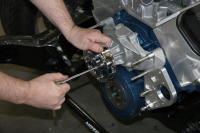
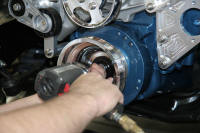
Using a power steering pump pulley installer we installed the power steering
pulley on the power steering pump. Note that the use of the power steering pump
pulley installer is necessary. The pulley cannot be installed by hammering or
pressing onto the pump without damaging the unit.

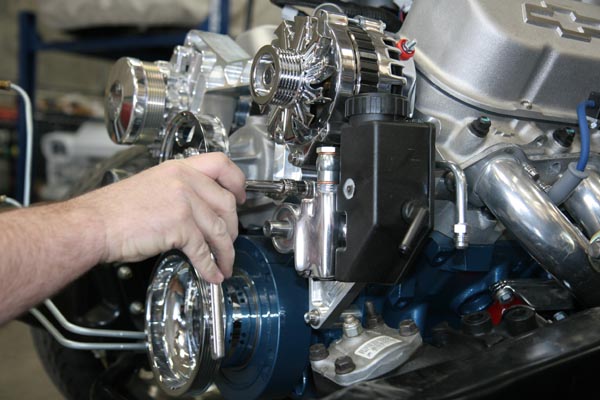
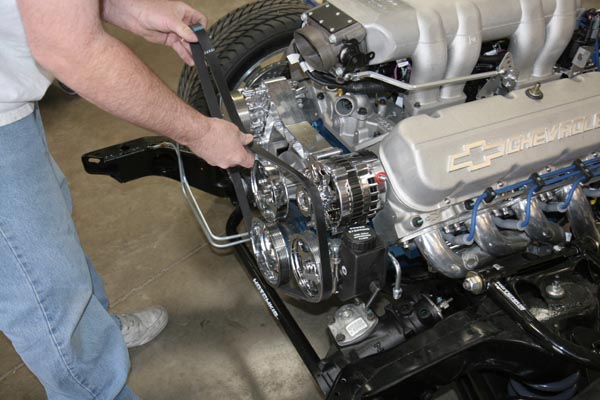
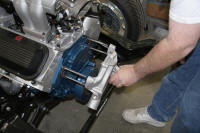
With every component in place, the main part of the set comes into play, the
belt. Using a �� drive ratchet or breaker bar to operate the tensioner we routed
the belt around the crankshaft pulley, power steering pulley, alternator and
over the compressor before ending with a slide under the water pump pulley.
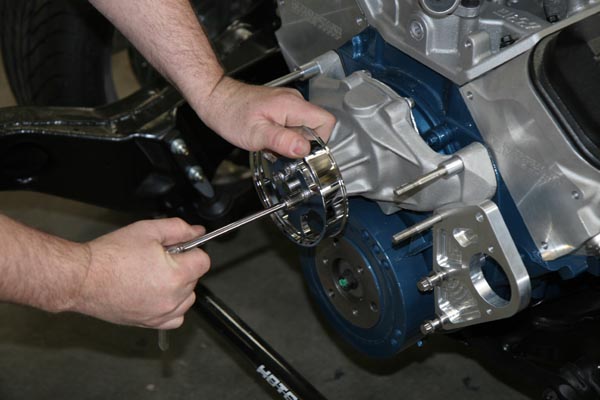
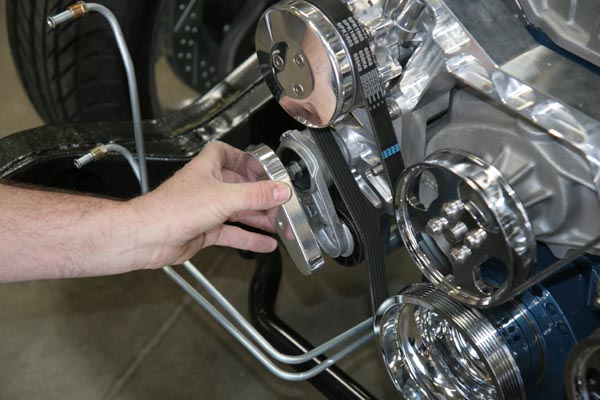
The last and final step was to install the belt tensioner cover, a polished
piece that cleans up the front of the system.
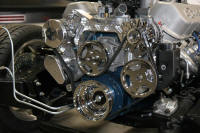
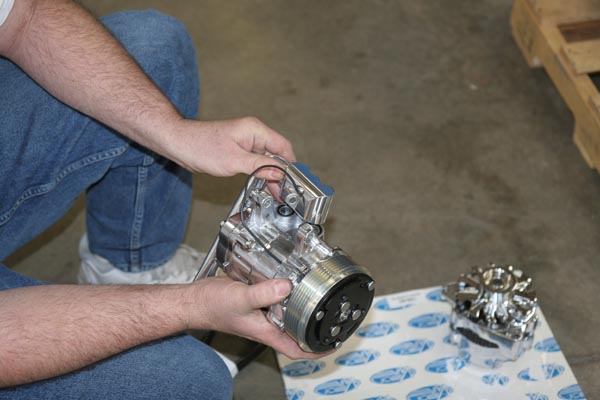
The finished product is something of a masterpiece. Vintage Air�s Front Runner
System is a must have for any big block installation.

|