|
I
put this web page together highlighting my
experience installing the Detroit Speed &
Engineering Quadra-Link rear suspension.
This isn't meant to be a 'how-to' article,
but more of an illustrated resource for
those that are contemplating doing the same
with their project. This will give you
an idea on what steps are involved, how
invasive it is, and how I did it in my
garage.
First off I want to take a moment to
say thanks to Kyle and Stacy and crew at DSE. I've been working with Kyle
for a number of years now and have quite a few DSE products in my project and
they are nothing but the best in quality and craftsmanship. I know going
into each step of the project that what I use from DSE will work the way it's
supposed to and if I run into something unexpected, they're only a phone call
away.
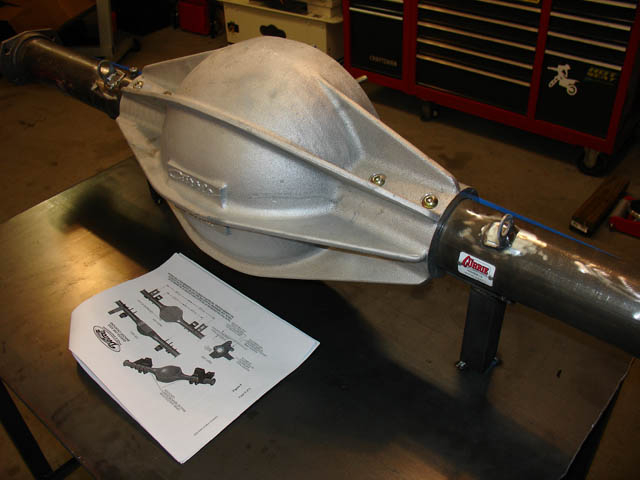
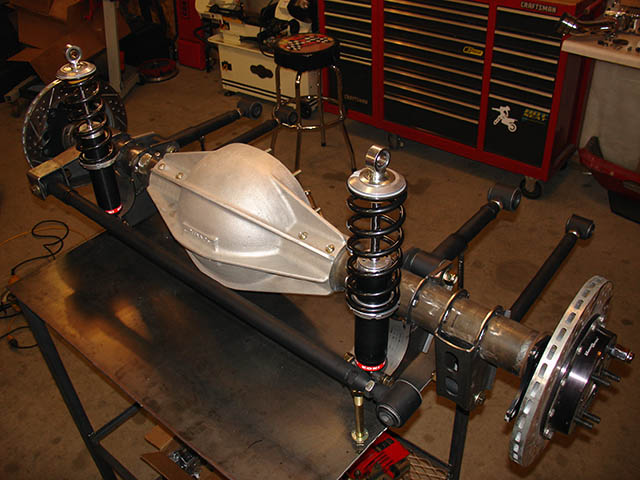
The Quadra-Link install in my car
presented a few unique challenges as I had already installed the mini-tub
crossmember at an angle for staggered shocks with a set of DSE 3" drop leaf
springs. I also already had a rear end housing that had the housing ends
installed. I'll cover how I got around that further in this article.
FIRST IMPRESSION: I
had read quite a few articles in various magazines and online forums about how
the Swivel Links worked, but I had never held one in my hand until opening the
boxes when the kit arrived. It's amazing how fluid their movement is.
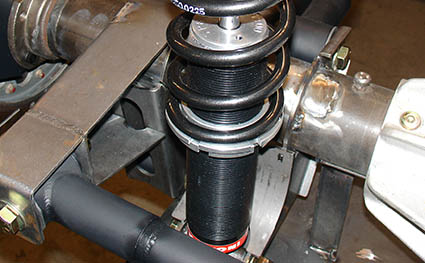
The Koni shocks
are some of the nicest that I've dealt with and the fact that they're adjustable
in rebound is evidence that the kit is all about performance. I skimmed
through the instructions and templates not finding anything that surprised me.
It's pretty straight forward.
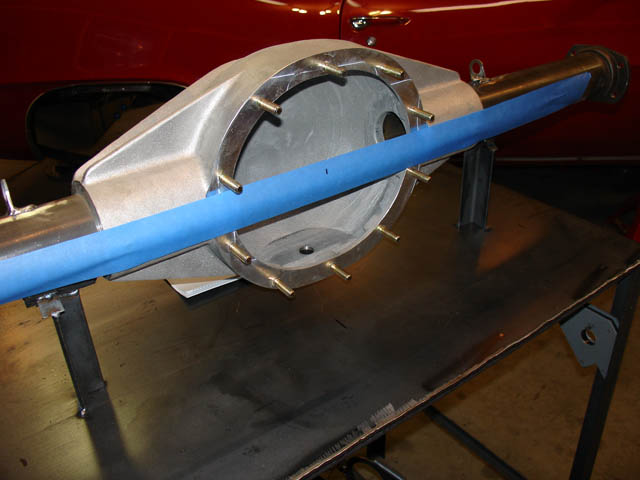
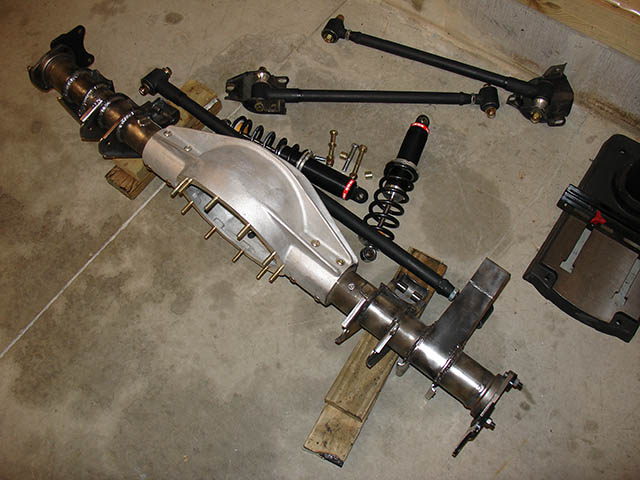
INSTALLING THE BRACKETS ON THE
HOUSING: The first step that I decided to take on was getting the
brackets installed on the housing. With the Quadra-Link system, it's
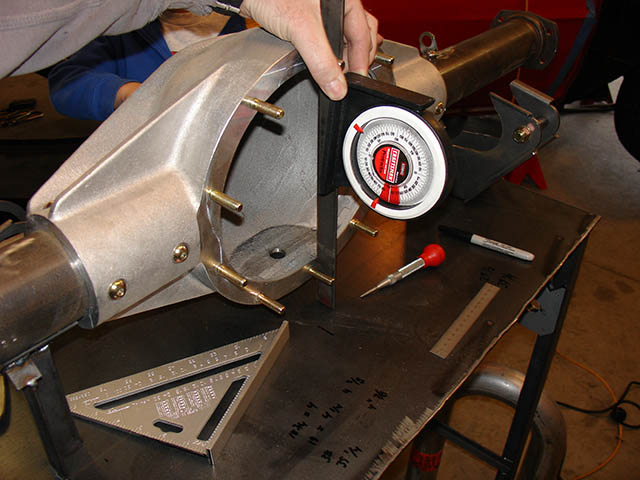
recommended that you set the pinion angle at negative 2*. I made a homemade jig by welding a pair of 6" angle iron
standoffs to the top of my welding table. Using an angle finder, I set the
pinion angle and tack welded it into place. The next step was to find the
center of the housing. I measured my housing flange to flange, found the
center and marked it on the welding table. From this point I measured out
to find the centerline of the upper link/coilover axle mount (14.75") and the
centerline of the lower link bracket (19.625"). Since my housing ends were
already welded, I had to cut each of those 4 brackets so they could fit over the
3" axle tube. With the housing already set at
a -2* pinion, the brackets are set with a level.
I tack welded the brackets to the housing (being sure to use the included inside
spacers to ensure the links will fit into the brackets after welding).
Then I tack welded the cut pieces of the brackets back together.
With all four brackets now tacked to the housing, the track bar bracket gets
welded to the left lower link bracket. I should note that my tack welds
were solid but minimal. I needed it to carry the weight of the car for
mock up, yet I needed to be able to remove the brackets in case I ran into an
unforeseen issue.
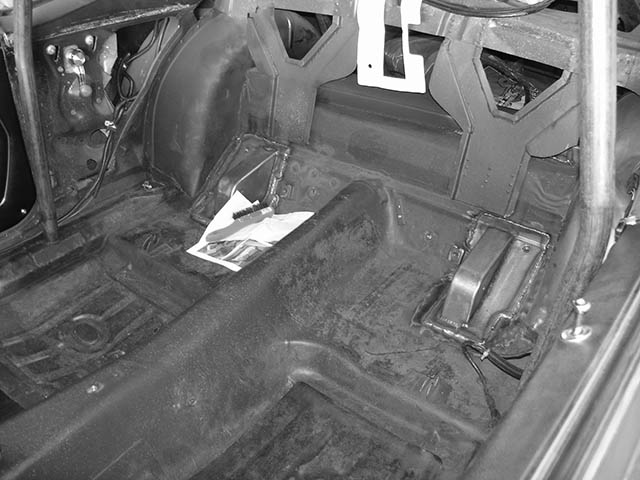
UPPER LINK FRONT POCKETS:
Next on the agenda was installing the upper link front pockets. To make
this job a breeze, there's a template included. You cut the template out,
tape the offset together and it lays across the rear floor across uneven
contours using the rear seat belt mount holes as reference. I cut the area
out, and just as noted in the documentation from DSE, some forming needed to be
done. My floor didn't quite follow the lowest area of the supplied
pockets. But as the saying goes, if you didn't hit your car with a hammer,
you didn't build it. It was easy job getting the contour of the floor to
match the pocket. I then fully welded the perimeter with a seat belt
mounting bolt holding the pocket exactly where it needed to be.
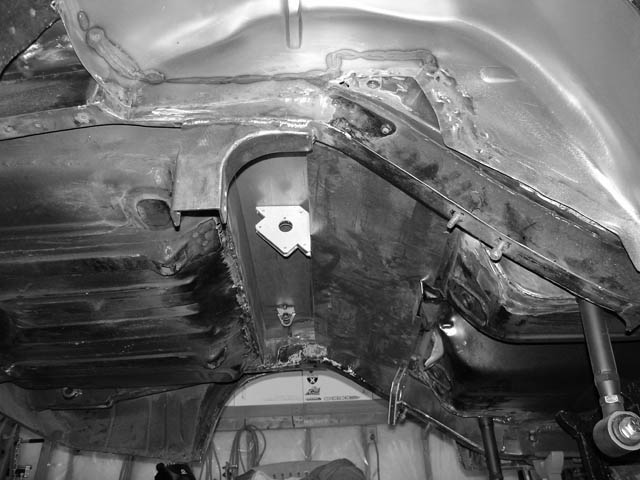
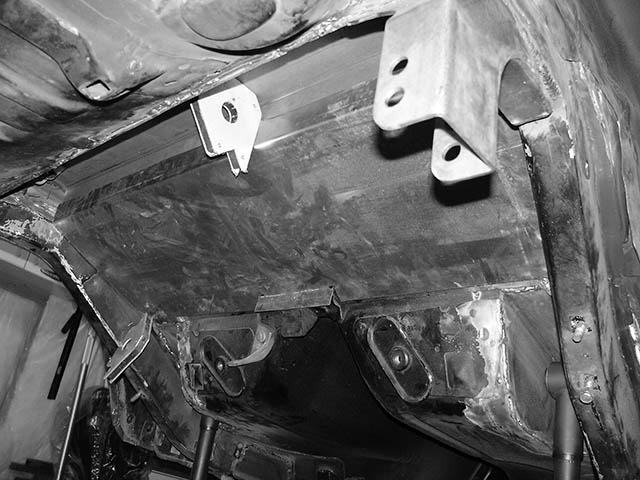
CROSSMEMBER - OUT WITH THE OLD,
IN WITH THE NEW: Next came the part of the installation that I
wasn't too excited about. As I noted in the lead in to this article, I had
already installed the DSE mini-tub kit and had the car set up for leafs.
That means the crossmember that I had already installed in the trunk floor was
angled for staggered shocks. That entire crossmember had to be removed to
make room for the new crossmember. The new one sits considerably further
back than the previous one, so it was going to leave a sizeable hole in the
forward trunk floor. Removing the old crossmember was a breeze with my
sawz-all. Installing the new crossmember was the next order of business,
so using the measurements provided, I installed it with a little fine tuning.
This step actually went really well. As it turns out, since it's square to
the car, it's quite a bit easier to install than the angled crossmember.
Made to fit up inside the crossmember is the track bar body mount.
Installing that was straight forward. Clamp it into place and weld it.
It has a built gussets that square it up to the frame member as well as the
bottom rear edge of the crossmember.
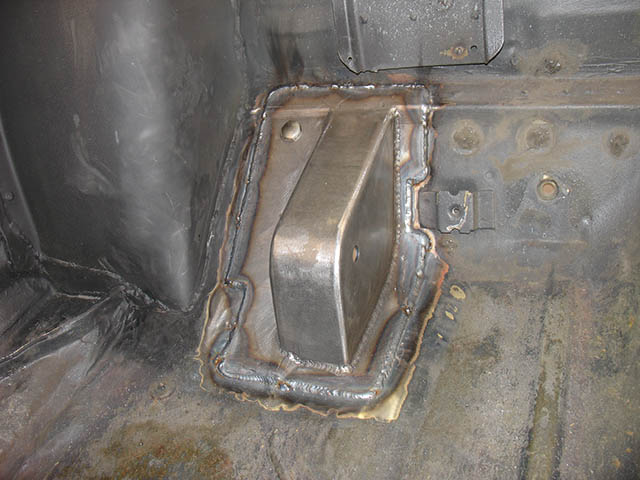
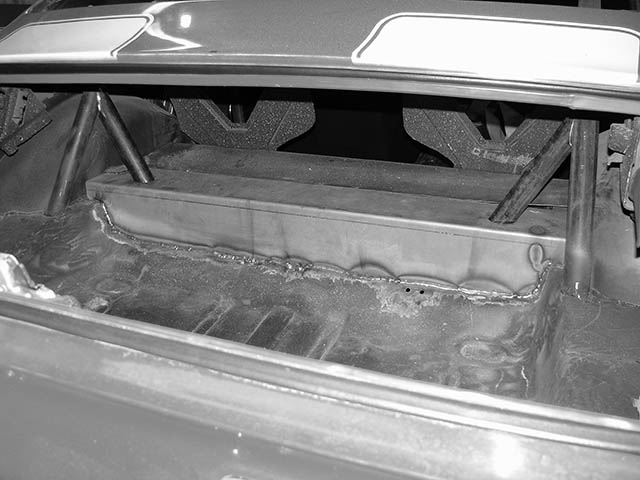
TRUNK REPAIR: On to
the issue of the hole. I could have used trunk floor patch panels, but
since everything else on my car is modified, what fun would that be?
Instead, I opted to fit a piece of 22 gauge sheetmetal that would follow the
angle of the back seat bracing and sit at the same height as the installed
crossmember. Underneath, I bent a piece of 18 gauge sheetmetal that goes
from the forward edge of the crossmember to the seam in the body just above the
new Quadra-Link upper link pockets.
MOCK UP AND FINISH WELDING:
With all of that done, it was time to get the rear end back under the car and
mock it up. With the links installed and the rear centered under the car
with the wheels and brakes installed, it was time to mark the locations for the
upper shock mounts. It was as simple as getting the coilovers vertical and
marking where they needed to be welded. This is where an extra set of
hands is useful. With that marked for installation, and everything else
verified, the rear came back out for full welding. The brackets offer a
lot of surface area allowing full perimeter welding in several areas. With
that completed, one final step of welding the coilover axle bracket
reinforcements was taken care of.
ADDING A LITTLE EXTRA:
While working in the trunk, I decided to add gussets from the crossmember to the
DSE roll cage rear down bars. Using some extra 1.625"x .134" wall tubing
and a tubing notcher, I welded reinforcements that were located at the top
of the crossmember where the coilover upper shock mounts were installed.
It's not required, but it's something that I thought made sense for my
application.
FINAL THOUGHTS:
Again, I want to note that this isn't a 'how-to' article, it's just my
experience and how I dealt with some of the issues that I encountered.
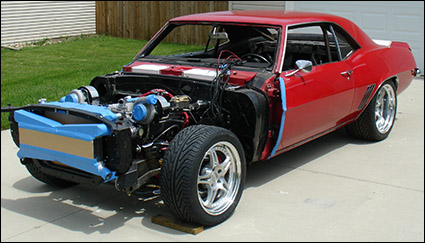
Below is how it sits now as a roller. Hope you found this helpful!
-Scott

|